
Connect a customer
Link a customer's Agentcard Wallet to your organization with a one-time verification in the messaging channel.
Before an agent can pay for a customer, that customer connects their Agentcard Wallet to your organization once. You start the connection with their handle (phone in E.164, or email); Linq drives a one-time code and consent through the messaging channel; you complete it with a verify call. After that, payments for the handle work without re-verifying.
Base URL for all calls: https://api.linqapp.com/api/partner/v3.
1. Start the connection
Section titled “1. Start the connection”curl -X POST https://api.linqapp.com/api/partner/v3/payments/handles/+14155550123/connect \ -H "Authorization: Bearer $LINQ_API_KEY"{ "handle": "+14155550123", "status": "not_connected", "connect_id": "cs_01HZY8"}Hold the connect_id — you need it to submit the code. Nothing on Linq’s side
persists it; it comes back from the provider and is required again to verify. Linq
now runs the one-time code and consent ceremony with the customer in the messaging
channel.
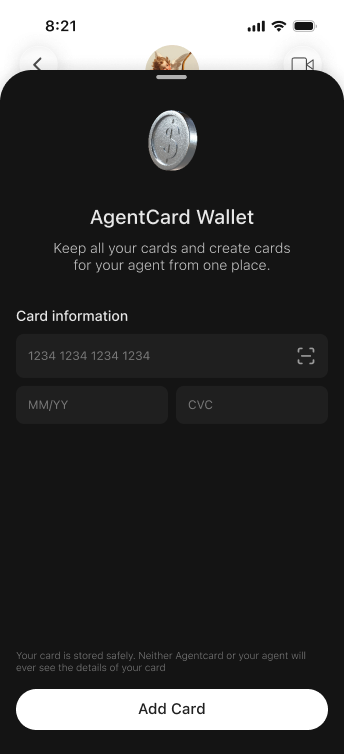
2. The customer adds a card
Section titled “2. The customer adds a card”The customer opens the Agentcard wallet and adds the card they want their agent to spend from. Card details are entered directly into Agentcard — neither Linq, your app, nor the agent ever sees the raw card number.
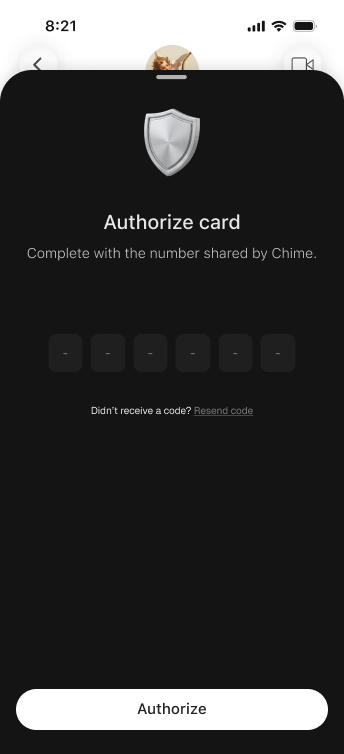
3. The customer authorizes with a one-time code
Section titled “3. The customer authorizes with a one-time code”Agentcard sends a one-time code the customer confirms to prove ownership.
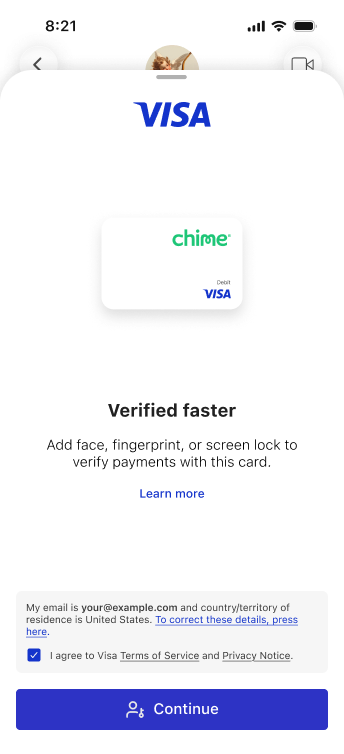
4. The customer confirms and consents
Section titled “4. The customer confirms and consents”The card is provisioned and the customer agrees to the card network’s terms. Optional biometric (“verify faster”) can be enabled here.
5. Verify the code to complete the connection
Section titled “5. Verify the code to complete the connection”The code reaches you however your channel works — typically the customer replies
with it in the thread. Submit it with the connect_id from step 1:
curl -X POST https://api.linqapp.com/api/partner/v3/payments/handles/+14155550123/verify \ -H "Authorization: Bearer $LINQ_API_KEY" \ -H "Content-Type: application/json" \ -d '{ "connect_id": "cs_01HZY8", "code": "482913" }'{ "handle": "+14155550123", "status": "connected", "connect_id": "cs_01HZY8"}This records the customer’s consent and stores the connection. You’ll also receive
a connection.created webhook. From here you can
create payments for the handle.
Check or revoke a connection
Section titled “Check or revoke a connection”# Current connection status for a handlecurl https://api.linqapp.com/api/partner/v3/payments/handles/+14155550123/connection \ -H "Authorization: Bearer $LINQ_API_KEY"
# Revoke the connectioncurl -X DELETE https://api.linqapp.com/api/partner/v3/payments/handles/+14155550123/connection \ -H "Authorization: Bearer $LINQ_API_KEY"Connection statuses: not_connected, pending, connected, revoked. If a
customer removes the connection you’ll get connection.revoked, and new payments
for that handle will fail until they reconnect.
- The wallet, card entry, and code are all Agentcard-hosted — you never handle PAN/CVC.
- Keep the
connect_idonly until you verify; it’s a temporary ceremony id.